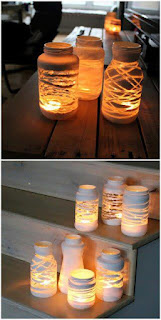
DIY- Yarn-wrapped Paint Jars
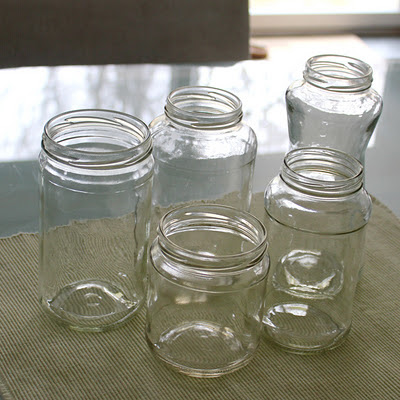
If you got here from Pinterest, Welcome :) This post has been quite popular and I'm glad you found it as well. If you like this tutorial please take a look at what else my blog has to offer. For more DIY posts simply click HERE. This was inspired by something I came across on the internet a while ago but never pinned and now I can't find it anymore. Go figure! I remembered that the original glass was white and had lines all over, so I figured I would just use some yarn and warp it around my jars and spray paint them to create the effect. Here is what you'll need: - Several cleaned jars. I always keep mine for projects. Soak them in water to get the tags off and use some Goo Gone for the glue residue. Make sure to clean them with soap to get all the Goo Gone off or else the paint won't stick. - Yarn or some sort of string. If the yarn has a lot of fuzzy fibers they may stick to the jar a little but it won't be very noticeable so don't worry about it too much - A can of white spray paint. I used Flat. You can use any color you want but with winter coming up I though white was best suited. - You'll also need something to cover whatever surface you'll be spraying on. Spray paint doesn't work as well when it's cold outside so it will take longer to dry. Make sure to give it some extra time before you touch the jars.
I used some regular packaging string and some yard with texture. Wrap the string around the jar tightly and tie a knot. Now wrap the string around the rest of the jar tightly criss-crossing and overlapping until you like what you see. Then just tie the end to the leftover string where you started and cut off the ends.
Place the jars onto your covered surface upside down and spray paint them evenly with 2-3 coats. Make sure to let them dry for 5-10 minutes in between coats. Once they are fully dried just cut the string in one place and unwrap. Now you can place a tea light inside and decorate away :)
I think it would also look cute to wrap some twine around the bases of the jars for some more texture.
I love the different effects the skinny string and the textured yarn create. The jars that were wrapped with the thicker yarn look like they have puffy clouds floating in the sky.
This project is also super cheap since the jars were free and I had the string and yarn on hand, all it cost me was a can of spray paint. They would also make great little gifts, just tie a ribbon and bow around 3 and you're ready to go.
DIY- Yarn-wrapped Paint Jars
 Reviewed by admin
on
11/27/2012
Rating:
 Reviewed by admin
on
11/27/2012
Rating:


